Thursday, April 29, 2010

WMS Preview Day 3

Are you ready for another day of previews? :D

I've been in love with the latest release stamps. They are all absolutely fabulous.

Today's cards focuses on a new background set. I used the same layout and even the same stamps to give 2 different cards.

This first card sneaks a peek at both Picnic Patterns and Words of Wisdom.

Aren't the patterns lovely? All the patterns you see here on the card are stamped using the patterns in the Picnic Patterns set. No designer paper was harmed in the creation of this card. ;-)

The top is embossed with white embossing power. For the bottom, I stamped one strip in VersaMark and then the other thinner one in cream. A very subtle effect.

The quotes from Words of Wisdom fit in various Nesties. Now not only can you stamp your own frames that coordinate with the nesties, you can stamp sentiments that fit into them. I like lots.

Ok, next card.

And even though it's not anywhere near Christmas yet, I created a Christmas card. I wanted to show that even though the name suggests its use for summer, it's an all-year round set. :)

You can see here I used the exact same patterns and the same layout. This means less thinking for me... sometimes it's nice to just stamp.

The only thing different is the color palette and the sentiment was pulled from Seasons of Love - Tags.

The striped paper -- stamped with VersaMark and then cream (I tried Spring Moss initially but it didn't stand out enough so I converted to cream so I guess technically its stamped first in moss and then I stamped over in cream). The top pattern is just stamped in red ink.


What do you think so far?

Check out these lovely ladies for some more sneaky peekies!


Albert Einstein Quote
Stamps: (Very Vintage Labels 3, Picnic Patterns, Words of Wisdom) Waltzingmouse Stamps

Joy
Stamps: (Very Vintage Labels 3, Seasons of Love - Tags, Picnic Patterns) Waltzingmouse Stamps

Wednesday, April 28, 2010

WMS Preview - Day 2

Welcome to the second day of WMS previews! The May release is absolutely fabulous and there's a few more sets than usual since it is also WMS's birthday! :)

I adore this new set called Asian Garden from Waltzingmouse Stamps. It's pretty different from the other Asian sets I've seen and own. And true to WMS style, there's a chockful of images and sentiments packed into this set.


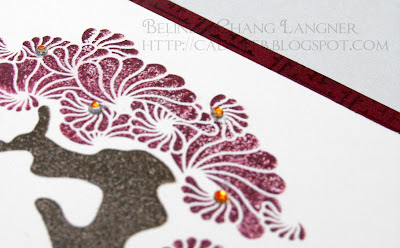
The back is stamped with a background stamp from this set. It's such a lovely background and pretty easy to line up.

The tree is 3 separate stamps so you can pick and choose your own colors. Isn't it an absolutely fabulous tree though? The leaves are absolutely stunning!


I placed some gems on the tree and then colored them with my copics. I was going for a gold color but decided that orange-hued gems would do the trick just as well.


Isn't the font for this just fabulous as well?

I have one more card and just a special birthday wish. :) I'm trying to be good this year (where my "year" starts around my birthday... haha)

I apologize that this is just leaving the mailbox today... but happy birthday D! :) Hope you enjoy another great year.

Ok, onwards to the card. I kept it relatively simple. I punched a square with 1 3/8 inch square punch. I added some pearls to the sentiment and the flower for some extra umph.

The main panel is popped up. Normally when I do this, I use some temp adhesive so that whatever I stamp underneath is somewhat centered. Except this doesn't always work when you then change your mind about where you want the panel located but that's a WHOLE other story.

Ok, hope you enjoyed today's sneak peeks!


What do you think so far of the sneak peeks? There's more too! Be sure to check out:
They all have some fun sneak peeks too!


Thinking of You
Stamps: (Asian Garden) Waltzingmouse Stamps
Paper, Ink, Ribbon: PTI
Gems: Hero Arts
Border Punch: Fiskars

Birthday Wishes
Stamps: (Asian Garden) Waltzingmouse Stamps
Paper, Ink: PTI
Pearls: Amuse
Ribbon: Offray
Border Punch: Fiskars

Tuesday, April 27, 2010

WMS Preview - Day 1 and cloud background tutorial

I've had a few questions about how I did the sky created in some of my cards: here, here, and here. So I decided I'd create a little card today to show you how it's done and give you a sneak peek of some of the May WMS sets. :)

Also, be sure to check out these fabulous ladies for some more WMS sneek peaks today!
Claire
Jennifer
Lynn
Anya

So here's my card today. I figured I'd show the card first for those of you not interested in my little tutorial. Hope you enjoyed today's sneek peek and be sure to stop by again tomorrow for more peeks!

We're keeping it simple. :) The flower images and the bg stamped onto the background both come from Picnic Patterns. The sentiment comes from Fancy Phrases. Both of these are lovely new sets that Claire designed that will be available May 1st.

It just made me smile when I saw "Cheerio" so I figured it'd work so well for a simple hello to a friend. There's a lot of unique sentiments in Fancy Sentiments that I don't have in my stamp set yet -- and "Cheerio" is just one of my favorites.

And now onto how the cloud background was created. :)

Cloud Tutorial
(Click on any of the images to enlarge them)


1. Gather your supplies
  • Post-it notes
  • Ink
  • Paper towel/sponge
  • Corner punch (or something to give you a scallop)


2. Take a few post it notes and cut a curve in the top of your post-it note. You want the curve to be wherever the sticky part is. I like to use as many as necessary to cover the width of my paper (in this tutorial I'm using 2)


3. Take the guard off your corner puncher and punch along the curve to create a scalloped edge. Be careful to line up the edges and with my post-it notes, I had to pull the scrap pieces from my punch sometimes since they did have a tendency to get stuck.


4. Here's a completed "cloud top" for your viewing pleasure. Trim the cloud in case you didn't line things up correctly during the punching phase.


5. Arrange the cloud post-its onto your cardstock. Take your sponge/towel, ink it up, and then gently sponge the ink onto the paper.

A few inking tips:
  • You an always add ink but you can't take away ink!
  • But, that said, a few mistakes won't matter. Especially since it'll get covered up later. :) Just keep going!
  • Make sure to rub the sponge/towel on some scrap paper first right after inking. This avoids major uneven globs of ink.
  • I tend to do my clouds in just a straight line -- not in a circular motion like I do normal sponging. I think it gives it an "airy" look.


6. Remove the post-its and repeat step 5.


7. I like to change the angle of the post-its a little to create more randomness. The other thing I like to do is to line up a point from the cloud from the previous run with a curve from the new cloud. Not sure if that makes sense, but the point is to make the clouds look like they're overlapping each other. So be careful how you line them up as you move your way down.


8. Keep going until you get to the bottom of the paper and now you have your own personalized cloud background! How spiffy is that?

Other thoughts
  • This technique could create a pretty neat hill effect if you do the reverse. Use the other part of the post-it and ink downwards.
  • You might also be able to create a neat ocean effect with this by changing the edge of the post-it.
  • So many possibilities -- Let me know if you have any other thoughts on what you could do with this!
I hope this helped clarify things and let me know if you have any questions!


Stamps: (Picnic Patterns, Fancy Phrases) Waltzingmouse Stamps
Paper, Ink: PTI, VersaMark
Tools: (Corner Puncher) W R Memory Keepers, (Paper Piercer) Making Memories

Monday, April 26, 2010

A little public service announcement


I don't have a card to share today, but I'll be back tomorrow with my first of a few sneak peeks for the May Waltzingmouse Stamps release! I wanted to pop in today to tell you about what's happening over at the WMS blog. I don't want any of you guys to miss out!

First of all, if you haven't already noticed, Claire has started showing sneak peeks of her eight (yes, eight!) sets due to release May 1. That alone should get you over there, but she also has a little contest going on right now. Make sure you take a look - free stamps for you and a friend are at stake!

In addition to this fun give-away, Claire will also run a shipping promotion on May 1st and May 2nd – just in time for those new release purchases. Orders that exceed £50 will receive free shipping. At today’s exchange rate, that is about $77 USD. All store purchases will count, even digi products! You can read all of the details here. That’s one sweet deal considering this is international shipping!

And don't forget to come back here tomorrow to see my first sneak peek at a terrific set releasing May 1 from Waltzingmouse Stamps!

Saturday, April 24, 2010

Happy Saturday!

Hope everyone's having a good Saturday! It's a little cloudy here today so my plan is to get through all my spring cleaning chores.

And we're making some tasty homemade pizza for dinner later. :) While I do promote healthy eating normally, I'm not against a pizza every so often. Besides, the husband deserves a treat -- the other day at the grocery store he asked me if we could get some kale... *THUD* This comes from the man that wouldn't eat green things before he met me (and I'm almost convinced he didn't know what kale was until he met me too). I like to attribute that to my good cooking.... Hah.


I got this fun lace stamp from Hero Arts and so I had to put it to use. :) It's a lovely stamp and so girly.

The pearl swirls I swizzled to make them fit my needs. Usually if the swirl isn't what I want, I just trim it and rearrange as I see fit.

The butterfly center is a button with some pearls on top of it.

Have a great weekend everyone!

Saturday, April 17, 2010

April Blog Waltz

waltz with us April 17th
Welcome to the April WMS Blog Waltz! :) If you happened upon my blog, you should check out all the festivities at the WMS forum! All the DT members participating may have some flowers hidden in our photos! Collect them all and you might win a fun little prize!

This month we were to focus on the theme of mothers so I have a fun little card you can send your Mom any time of the year.

I decided to merge Spring Baskets and Roses in Bloom, my favorite floral set of all time (well, as of now... you never know what Claire has up here sleeve!)

The roses and leaves are embossed with white embossing powder. After I did that, I decided the roses didn't stand out enough. Instead of coloring, I applied some light cream ink with a paper towel to give it a softer look and let the roses pop just a bit more. It's funny, after trying multiple sponging products, I've discovered paper towels work the best for me when applying ink to a project. (Although I only buy these really expensive cloth feeling paper towels -- got hooked on them and now no other paper towel is good enough... so I'm probably not really saving any money. In fact, I'm pretty sure I'm killing more trees and spending more money than if I just used a sponge)

The sentiment comes from Spring Baskets -- I love intermingling my sets and this sentiment fit the area I had left the best. I didn't think ahead when I started the card -- none of the sentiments I wanted really fit in the area I had left. So I just went sentiment hunting through my other sets.


Thanks for waltzing by!

Stamps: (sentiment from Spring Baskets, flowers and leaf from Roses in Bloom) Waltzingmouse Stamps
Paper, Ink, Ribbon: PTI
Border Punch: (Apron Lace) Fiskars

Thursday, April 15, 2010

My First Bike

My first bike was a perfect pink bike with training wheels.

It had little pink tassles and a little white wicker basket.

We lived in an apartment building at that time so my bike was stored in the bike rack downstairs in the parking garage. After just a week, someone stole my bike's pink tassles and my white wicker basket.

Very devastating for a 5 year old.

So here's a card in memory of my bike with tassles and a white wicker basket. To whoever stole my basket, I hope it went to a good little girl.


I adore bike stamps. And this one from Hero Arts is my fave -- perhaps because it has a cute little basket.

The sky was sponged with some spring rain ink. I cut 2 random curves and created some clouds with my corner rounder. Moved my two little post-its around randomly and sponged. Fun effect. :)

The grass is stamped and embossed with clear embossing powder.

I placed some buttons on the wheels and stuck a gem over the middle. Gems are over the flowers in the basket as well.

A little ribbon, a little border punching, and I called it a day.

Happy Spring everyone! :)

Monday, April 12, 2010

Friends Forever

I shop when I'm sad and lonely. Online, in stores, in the sun, in the rain...

But I got a new cardi. The new cardi makes me happy. :)

You know what else makes me happy? Packages!

I FINALLY got my Swaping Sisters package and I tore it open as I knew Steph had sent us fabulous wood paper. I've been itching to get my hands on some.

She gave us a sketch to work with. I kinda followed it... if you squint and twist your head.

This whole card was born out of my desire to die cut the wood paper.

The wood went through the cuttlebug just dandy! Although next time I'd put the wood face down rather than upwards. I think the embossing should be on the wood side -- duh Belinda.

I got some 'new to me' Hero Arts stamps. Blame it on another "I'm sad and lonely" day. So what do you do with new stamps? You get them inky!

Some ruffles to match the owls and sponged with a little red ink.

Can't wait to play with the wood paper some more! :)

Check out what everyone else did with the wood paper:
Steph
Laurie
Ren-Yi

Saturday, April 10, 2010

Happy Birthday

I need a new sewing machine. I've sworn at mine enough I think.

I even resorted to hitting it today. At least there's not Sewing Machine Services or something like that...

I have to take it apart every time I switch the settings. It's getting ridiculous.

Any suggestions for a new machine? I do dabble in real sewing as well as mainly using it for cards -- so a simple mini one isn't enough.

Ok, enough of my woes. Let's move onto cards.


Simple. But that's the joy of Free Spirit - Boy and Free Spirit Sentiments from WMS. You can do simple so easily. And with the stamps in the set, it's so easy to do so. :)

Imagine it in different colors... still the same idea yet it could bring a whole new spin to it. :)

And now yours truly must hand hem the husband's pants. I HATE hand hemming. At least there's TV to keep me company.

Why can't boys hand hem themselves?

Friday, April 9, 2010

Too Long NC!

I miss NC -

I miss the containment area for relocated yankees.

I miss Bo-Jangles, I miss sweet tea, I miss the taco truck and even though it appeared after I left, I miss the Korean BBQ truck. I miss a lot of food things...

I also miss my favorite crafting buddies, the easy access to scrappy stores and crops. I really miss the crops.

Although luckily, everyone has been posting about the pollen issues so luckily for me, my NC-sickness has subsided a little -- the one thing I don't miss is having my black car look like a bumble bee.

So I have a card dedicated to everyone and everything I love about NC.


I extended the legs of the little birdie with my black pen. I like that the long legs and the sentiment of "It's been too long" mish just like that. Stamped the sentiment on vellum so you could still see the legs.

It has truly been too long, NC.

Then again, I really missed MN for awhile and I got over it. I really missed PA and I got over it (doesn't help that I moved back). I missed IL for the longest time and I got over that too. Such is my life.

I wonder what the next place I'll "miss" will be.

Monday, April 5, 2010

Dude Its Your Day

I love the weather right now. Sun and warmth makes me a happy girl! So much so that I've been out and about and not crafting.

Now that the weather is nicer, I swear I am in a dire need of a vacation. Actually, I could have used a vacation for awhile. Alas...


Just wanted to share another card using Free Spirit - Boy and Free Spirit Sentiments from WMS. :) Lots of fun to play with! The background is stamped with the wavey stamp just using the straight part of the image.

Thursday, April 1, 2010

WMS April Waltz

If you are just starting this waltz, please begin at Claire’s Blog and follow the “dance card” as you waltz your way through. Be sure to stop by everyone's blog -- as usual there are prizes to be won! Make sure to leave comments by 11:59 EST on Sunday for a chance to win.

As some of you recall, my husband is becoming Dr. Hubs in May. With this new salutation, I am hoping to not be the "sugar momma" anymore. So we begin with a graduation card.


Simple and to the point. A little color, a little cut out hat and some stars. I colored over the stars with my clear glaze pen -- much quicker to dry than glossy accents and a fun, simple touch.

A little sewing, a little swearing at my very poorly calibrated sewing machine. One day... I will definitely get a new machine. Or find someone to service my gazillion year old machine. Or convince my hubs to buy me a super nice one - and a hemming foot so I can better fix his pants.


I know you guys have seen this image used already but I wanted to show it in a different light. I love this for guy cards but you can also make Halloween cards. Doesn't it look so spooky and mischievous?

So its a little early for Halloween perhaps but there's more than one way to use that awesome circle graphic image. I wasn't going to share this yet but I decided that its never too early for Halloween, just like its never too early for Christmas! *Smile*

Waltz over to Jennifer for some more crafty goodness!